
Hello beautyholics and welcome to the 4th episode of the Rudiments of Rouge! 😀
After talking about the two popular types of blushes, today I’d like to share with you on how to apply blush on your cheeks.
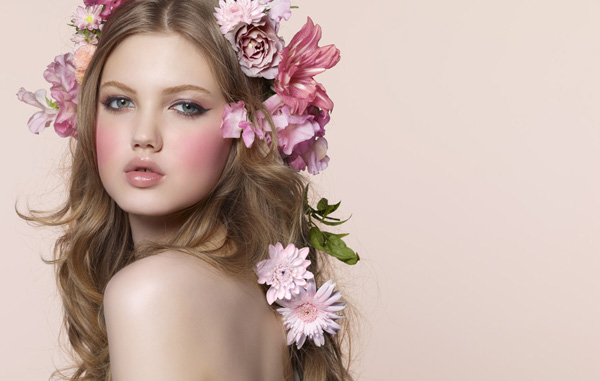
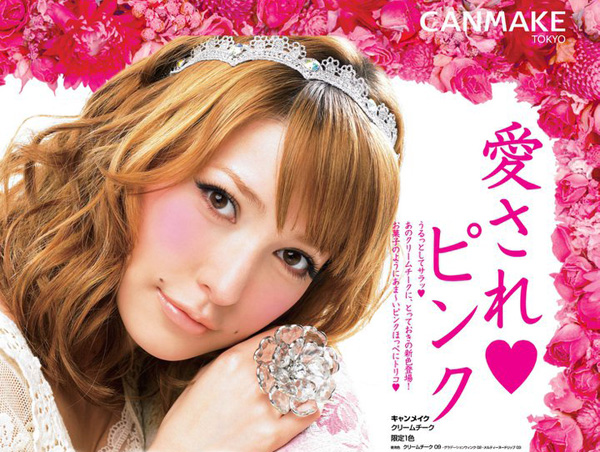
I’m not speaking for all women, of course, but a majority of them aren’t keen on using blush because they’re worried of how red it will make their faces look. The biggest apprehension is that the rouged cheeks won’t look natural. It might look like pink china doll cheeks or worse, look tarty.
No no, I don’t mean she looks tarty!
I totally get that. Heck when I first started using blush 10 years ago, I used one that’s so sheer and with such a light hand that you can’t even tell I’m wearing blush! It was like, and the point of wearing blush was …??
*cricket sounds*
It doesn’t have to be like that. Blush has to be applied to a point where it’s visible on the cheeks but not so much that it draws immediate attention to it. The best way to describe a good application of blush is when you look like you’ve just had a good exercise. The flush that naturally appears on your cheeks is what you’re aiming for. That’s a start. If you’re prone to redness or have rosacea, then there’ll be a lot more redness to the face, not just the cheeks. The redness might spread past the apples of the cheeks to the jaw. That’s not the level of flush we’re looking for.
By the way, these methods are just for blush application. It doesn’t include contouring or highlighting, which will be covered in a future post (y’know, once I master them myself! :P). Bear in mind though as I’m not a makeup artist nor an expert in makeup. These application tips work well for the shape of my face. If you have a different face shape (long, petite, round, square and so on), it may not work for you. My best tip for you is always to experiment with different methods and see which one works best for you. 🙂
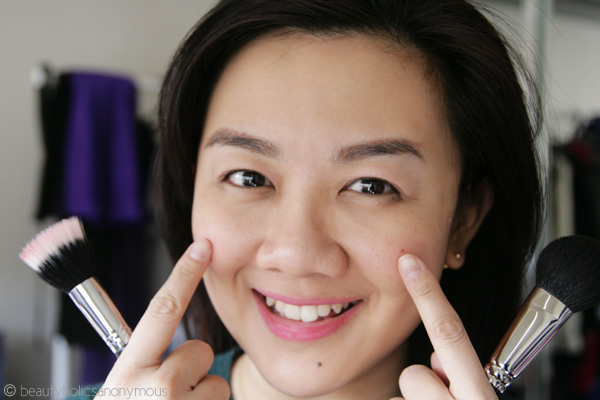
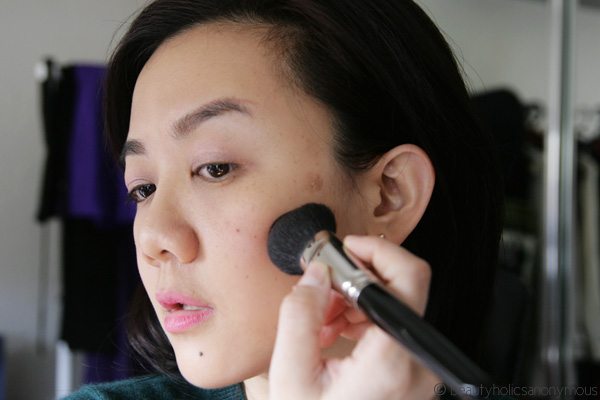
A good start is on the apples of your cheeks. If you have pronounced cheekbones, smile naturally and begin there. Press your blush brush onto your blush, remember the tap the excess off and then swirl the brush on the apples of your cheeks. Use a sheer blush and then build the layers for more colour. If you’re new to blush, I don’t recommend a bright blush in case it scares you off with way too much pigment. If it wasn’t for the makeup artist who tried it on me, I’d have run a mile away from NARS’ Exhibit A 🙂 Remember to blend, blend, BLEND! Start on the apples and then blend upwards stopping below the eyes.
That method is for younger skin with pronounced cheekbones. If you have mature skin and/or don’t have pronounced cheekbones, here’s a tip I picked up from Rae Morris at the L’Oreal Melbourne Fashion Festival. As we get older, our skin sags downwards (oh the curse of gravity and age!). If you smile and apply blush on the apples of your cheeks, the “apples” won’t actually be on the apples of your cheeks but lower. You’ll end up with blush just below the apples and it will look like it dragged your face down.
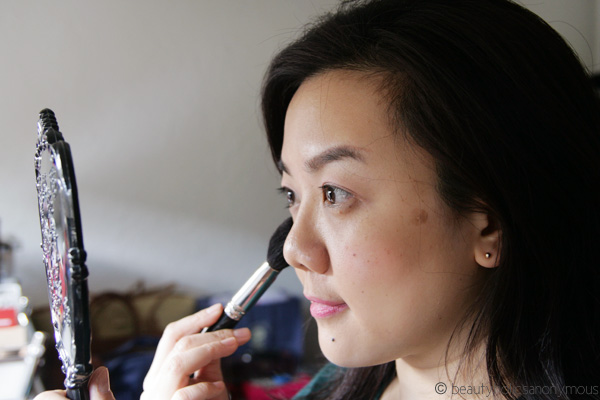
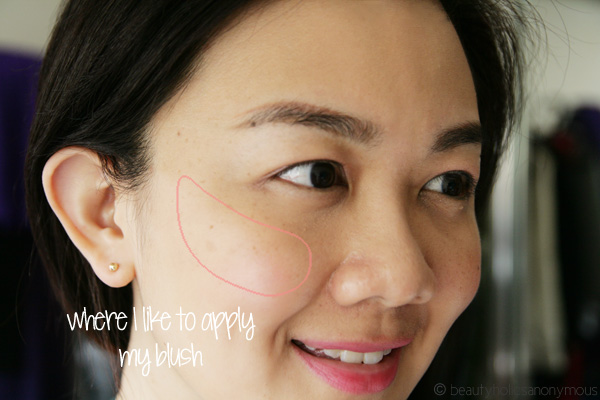
A way to rectify that issue is to look straight ahead at the mirror, relax your face but don’t smile and apply the blush to the tops of your cheeks (where light would hit it the most). Don’t apply the blush past the eyes (maximum temples) and don’t go past the first 2/3 of your face (measuring from hairline to jawline). Best way to remember where to apply the blush would be to imagine the Nike logo on your cheeks. Do a small, gradual “tick” motion from the apples of your cheeks to the outer corner of your eyes. Once you’re more comfortable applying blush to your cheeks, you can extend the area and do a “C”, which is from the apples of your cheeks to the forehead area above the eye.
Another common question on the usage of blush is: if I have a lot of redness on my skin, or if I naturally have rosy cheeks, do I still need to apply blush? I love people with rosy cheeks. A dear friend of mine has rosy cheeks and I think she’s gorgeous. On the other hand, if you do have rosy cheeks or a lot of redness to the skin, they can often be not uniformed. E.g you can have redness only on the left apple of your cheek but have that same redness extend past the right apple of your cheek till your jawline. How would blush work? Does that mean that rosy cheeked ladies can’t wear rouge?
Au contraire! All you have to do is even out your skin tone first with foundation (or BB cream if you prefer). Perhaps use one with slightly more coverage if you have a lot of redness on your skin. Once you’ve evened out your skin tone, your face is now a great base for you to add whatever colour or how much colour you like! Think of it as toning redness down to add redness, if that makes sense. This way, you can use any other tones of blushes (warm or cool) and not just needing to stick to one that matches only to your redness.
At the end of the day, the best way to try out blush if you’re a newbie is to try out sheer ones and build them up. Don’t just concentrate on the apples of your cheeks with a strong colour because then you WILL look like a doll. Of course, if that’s the look you’re going for, hey no judgement! 😉
I hope you’ve enjoyed today’s edition of the Rudiments of Rouge. Tomorrow I’ll show you how to fix blush mistakes. 🙂
How do you like to apply your blush? Apples of your cheeks? Or just the contours? I’ve seen some done on just the contours of the cheeks and it actually looks quite good!


Oh, I kept looking on the mirror to see if I did my blush correctly while reading your post, hihihi…. I ususally apply on the apples of my cheeks because that is easier, lol… I really wanna try doing the blush on the contours only because I see some really look good on it but I haven’t mastered it yet… It looks different on me.
Be careful applying blush to the contours only because it can make you look a bit strange with pinkish stripes below your cheeks. Use bronzing powder instead as it’s meant to look like it’s shadow cast from your cheekbones 🙂
I’ve done the “smile & apply” method AND the “apples of your cheeks” method. So many freaking methods but like what you said, do what works for you so long as it makes you look good. Not the you know…China doll style…unless that’s the look you’re going for of course! hehehehe
Norlin recently posted..Fashion Day: How to Look Sexy But Classy
Me too! Just do what works for you because you know what suits your face the most. I’ve seen some applied just on the contours with barely anything on the cheeks. Looks weird on me but looks great on some 🙂
Lovely post and something I have been looking for. I tend to apply like how you do but concentrate on the contours to make my face look better. I sometimes over apply of course because I always tend to be in a hurry to go to work. Lol. Must definitely start with a light hand first and then build up to ensure my blush looks more balanced.
Oh light hand first, most definitely! And always, always tap the brush once you’ve pressed it on the pan to remove the excess. Often I see women just apply directly and they end up with too much powder and pigment on their cheeks.
Actually, I seldom tap the excess of the blush as I apply it directly on my cheeks. Maybe I should remind myself to do this as I would then be able to build the colour on my cheeks more gradually. So, if I apply 3 swipes of blush, do I always need to tap the excess eventhough sometimes the blush is quite sheer?
Yeah I’ll still tap the excess off because you don’t want to end up with too much powder on your cheeks, even if the blush is sheer. You want the pigment to adhere to the brush and then your skin, not just talc.
Also I think it’s worth mentioning the problem that having uneven skin tone makes more difficult to apply blush: if you apply it to strong or bolder, your dark spot will appear more blushed than the other parts.
Efrain recently posted..De cómo llegué al mundo de la cosmética
Good point, Efrain! It’s very important to even out the skin tone first prior to applying any other makeup. Fill up any holes, cover any bumps, make sure the canvas is as smooth and even coloured as possible before adding any colour. Gee I sound like a painter 😛
It’s the reason we’re artists to have a flawless application we need to use many techniques.
Efrain recently posted..De cómo llegué al mundo de la cosmética
Great tutorial. And thanks for the reminder to tap tap tap the brush before applying. I always forget that!
Allison recently posted..At-Home Hair Color Gets Closer to Salon?
Thanks Allison. And yes, tap tap tap! 😀
I used the stippling brush for cream blush today, as you mentioned in your previous post. It picked up quite a lot of product than using finger. Good thing is that my fingers are left clean. When I do use fingers, I dot them along cheekbones, and pat out with 2 fingers. 🙂
Aww shucks. My stippling brush is quite sparse at the end, which is why it worked better than my finger 😛 Good idea to dot and pat!
Yay! You’re talking about my favourite topic in makeup! hahaha, blushes! Whoohoo!
I think I have roughly the same face shape as you, with prominent cheekbones. I think. Normally, people say I am sort of diamond, sort of heart-shape… … Whatever it is, I actually apply blush at exactly that area you drew out in the picture! Some kind of amazing to see you posting exactly what I do every morning. =PP
I definitely don’t apply on the apples because that highest point falls to the same level as the bottom of my nose, and way too close to my nose, when I don’t smile. After so many years of doing my own makeup, I know where to apply without making funny faces already – it is normally right on my cheekbone, at the point under the outer corner of my eye. From that point, I will pull the blush backwards, and all the way up to the top of my ears. Then I will go back to the starting point and keep going around that point, making it look like a tadpole-tick.
I have one thousand and one ways to apply blushes actually. And each of my blush has a special way, using a special brush (too many blush brushes). Coincidentally, I also want to talk about this topic! Have made a video on it… just too busy to edit and upload.
My latest lazy-woman-cheat-code, is to use the Real Techniques Stippling Brush on my Josie Maran Colour Stick (cream) blush, and stipple over my cheeks, then quickly dust loose powder over, and run out the door! The Real Techniques brushes are so lovely to use on creams and gels.
Jyoan recently posted..Ole Henriksen Nurture Me for Sensitive Skin (Night Cream)
Thanks for your comment Jyoan. It’s so good to find a blush aficionado! 🙂 Looking forward to reading your post/seeing your video on blush application with different blushes and brushes! (y’know, no pressure and all that. Ahem) 😛
Oh, and I cheat by counting how many times I swirl the brush in the blush, and counting on many times I tap/pat/stipple the blush on my cheeks.
LOL. I will do it left cheek, right cheek, left cheek right cheek, and count every time. This way, both sides look even.
I realise that I can really go overboard on my right side (dominant hand) if I don’t discipline myself.
Jyoan recently posted..Ole Henriksen Nurture Me for Sensitive Skin (Night Cream)
Wow! You actually count the number of times you apply your blush? Full on! 😀 Dang, I don’t even do that. Ahh no wonder sometimes one cheek looks lighter/stronger than the other! 😛
hey Tine…ok, i have a question – is blush or bright eyes the priority??? ok, i have hardly done makeup and my expertise goes till only blending the bb creams so my ques might be really stupid but i love the colors of blushes but i have no idea which ones to try or whether there is even a need?
Swati recently posted..From the Archives : Hair Tips for Monsoon {Hair Care}
You know me, I’m definitely going to answer blush. 😛 BUT…it depends on the occasion. When I attend events in the evenings, my priority goes to my eyes and/or lips, not so much the cheeks because under harsh lighting, you can’t see much of the blush unless you’re heavy-handed with it (not my style). However, during the day, I like to focus more on my cheeks and lips, not so much the eyes. Although I do wear contact lenses, I wear glasses a lot more often so I enhance the cheeks and lips more.
As for blushes to try, I know it can be really overwhelming (just like I am over the amount of fake lashes and lippies) so just stick to a couple to begin with. One warm toned, one cool toned. You can always build up later when you’re more confident 🙂